


Blog Post
Web analytics

Nadine
Wolff
published on:

Using Headlines and Page Titles in Google Tag Manager
Table of Contents
Google Tag Manager is a widely used tool for managing tags. In this context, a tag corresponds to an element or action on the page that you want to track or analyze. By setting up trigger rules (triggers), you can define when specific events—such as clicking a button, submitting a contact form, or loading a particular page—should fire.
Variables allow you to extract very specific information from the page, such as the page title and text headings. These help make your event tracking reports much clearer and easier to read. Let's look at how this works.
Getting Started with Google Tag Manager
Google Tag Manager is purely a management tool, making it easy for users without deep technical backgrounds to implement comprehensive tracking. Using the UA number of your Google Analytics property (which is unique to each created property), collected data and values can be sent directly to your reports.
Google Tag Manager already provides templates for many tag types that you can readily use.
These include, for example:
Universal Analytics
AdWords Conversion Tracking
DoubleClick Floodlight Counter, or even
Ve Interactive Pixel
Custom HTML tags or custom image tags can also be used to track or inspect specific elements.
Variables play an essential role in Google Tag Manager. By defining variables, you can pass specific information from the page into your Google Analytics reports or use them as trigger conditions.
Why Query Page Titles and Headings?
A classic example of event tracking is a button click. Especially when buttons are part of site-wide elements like headers or footers, tracking helps pinpoint which page the user interacted on. Sure, you could use predefined variables like {pagepath} or {pageurl} for this. But is that really user-friendly when viewed in a Google Analytics report? It becomes much more intuitive if you display the page title or a heading like
< h1 >,< /h1 >
< h2 >,… instead of the URL path. In the next section, we'll show you how to set this up.
Creating Variables Using JavaScript
Creating variables works quite similarly to setting up tags. When you go to create a new variable, you'll immediately see several options to choose from.
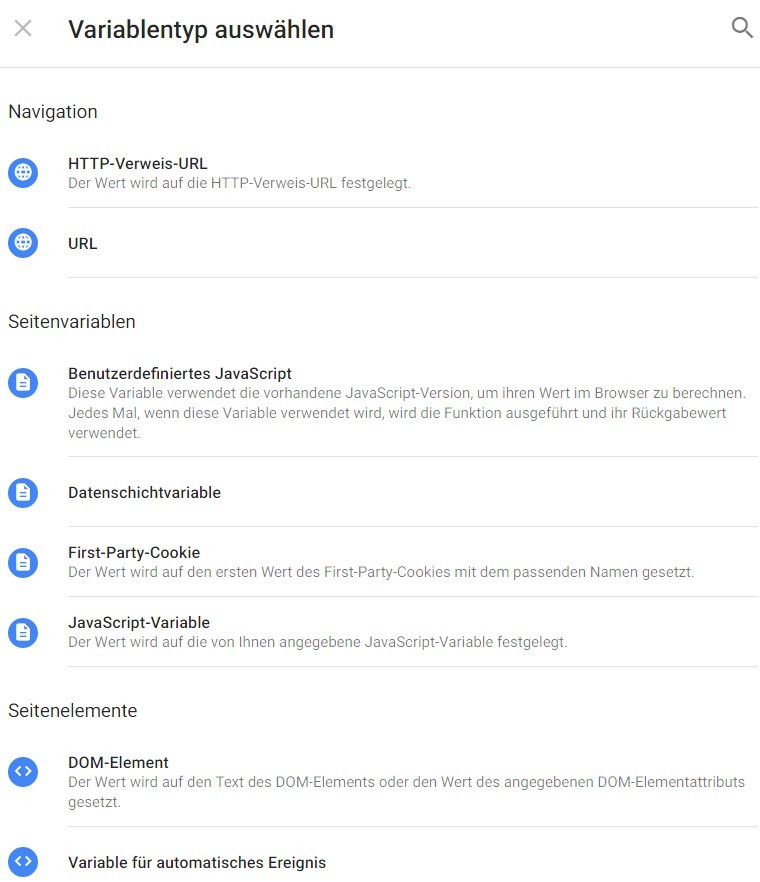
Fig. 1: Options available when creating a variable
To capture the page title, you can use the JavaScript Variable type, as it can always be retrieved the same way.
The variable name is document.title and should be entered into the "Global Variable Name" field. The created variable will look like this:
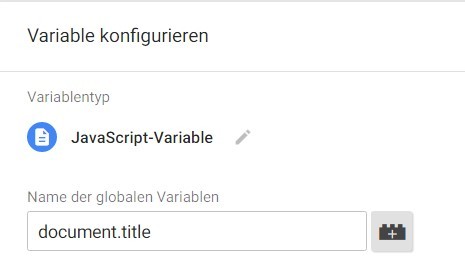
Fig. 2: JavaScript variable for the page title
As you can see, grabbing the page title from a webpage is straightforward.
You can also pull the content of individual elements from the document and use that information either as a trigger condition or to make your reports cleaner.
To do this, we use the getElementsByTagName() method. Create a new variable and select Custom JavaScript as the variable type. Follow the example below to retrieve the first H2 heading on the page.
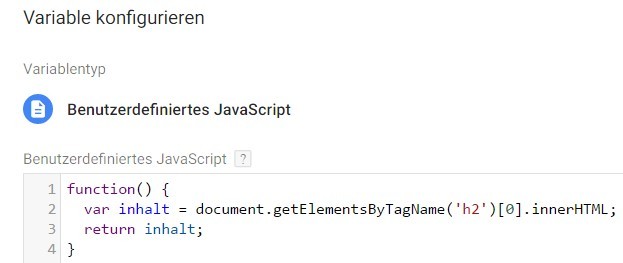
Fig. 3: Custom JavaScript to read an H2 heading
You can naturally use this function to read any other headings or HTML elements as well. Simply replace the value in parentheses, including the quotes (shown in red in the screenshot), with something like "img" for images. The elements are indexed starting with zero in the square brackets that follow. This means that [0] targets the first H2 heading, [1] targets the second H2 heading, and so forth.
The .innerHTML property specifies that the full string inside the tags will be returned. You can also leave this off, which will pass the entire string as well.
Quick Tip: How to Test Your Code
It's always reassuring to test commands—or in this case, methods—beforehand. To do this, simply open the Developer Tools console on your webpage. You can press F12 or right-click anywhere on the page and select "Inspect Element" in Firefox or "Inspect" in Chrome. A panel displaying all kinds of site information will pop up at the bottom of your screen:
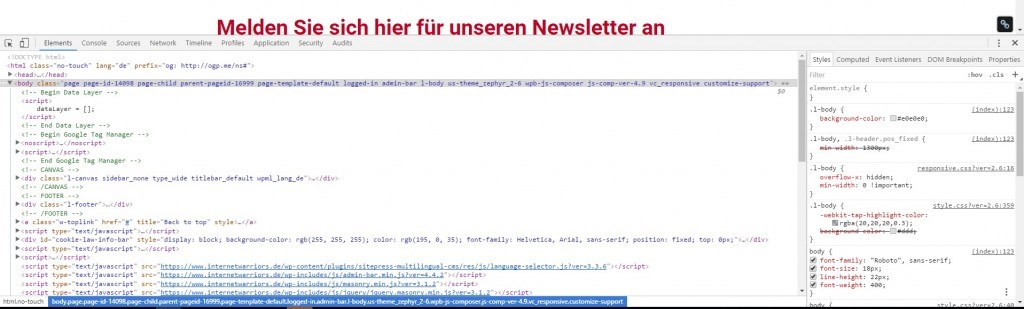
Fig. 4: Developer Tools console in Chrome
Now switch over to the second tab, "Console." Here you can check the output generated by your scripts.
The following screenshot shows the test for capturing the page title and querying the page's first H2 heading. Just press Enter to see the result.
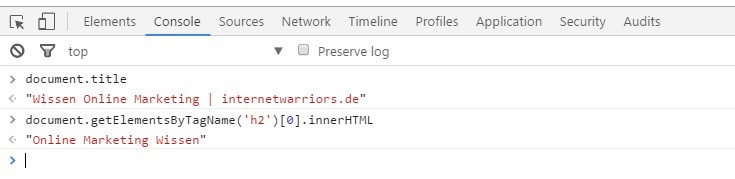
Fig. 5: Querying the page title and the first H2 heading in the console
Use Cases for New JavaScript Variables
Once you've set up your new variables in Google Tag Manager, you can use them directly in your tags. As mentioned earlier, the biggest perk is having clean, easy-to-read reports in Analytics.
A classic use case for these variables is measuring the performance of blog posts—specifically, tracking how often an article is shared. With this click tracking (clicks on the share button), you can see which social channel (e.g., Facebook, Twitter, or Google+) the post was shared to. To keep the event report neat and tidy, using the H1 heading works best on our blog, as shown in the screenshot below:
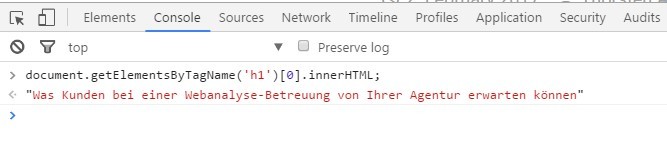
Fig. 6: Checking the H1 heading on the blog
In our example, this information works great as an Event Label. In the tag settings, you can now select your newly created variable using the "PLUS" icon.
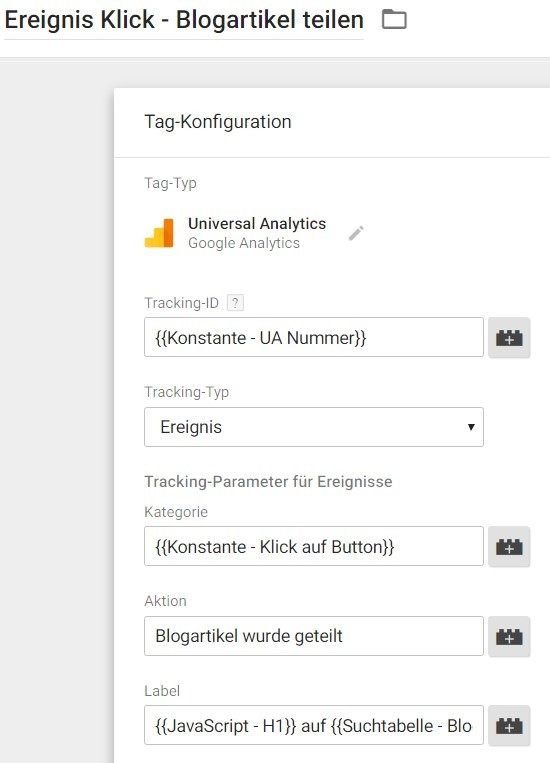
Fig. 7: Configuring the tag to track which article was shared
Additionally, we use a lookup table in the Event Label to capture the channel (Facebook, Twitter, Google+) through which the article was shared.
To view your collected data and values, head over to your Google Analytics reports. You can find the event tracking numbers under:
Behavior Events Top Events
How Can We Help You?
Still have questions, or need guidance on using web analytics and evaluating data with Google Analytics? We'd love to hear from you—feel free to get in touch with us. We're happy to help!
Nadine
Wolff
As a long-time expert in SEO (and web analytics), Nadine Wolff has been working with internetwarriors since 2015. She leads the SEO & Web Analytics team and is passionate about all the (sometimes quirky) innovations from Google and the other major search engines. In the SEO field, Nadine has published articles in Website Boosting and looks forward to professional workshops and sustainable organic exchanges.
